Newborn Photo Before And After Ideas For Better Contest Entries
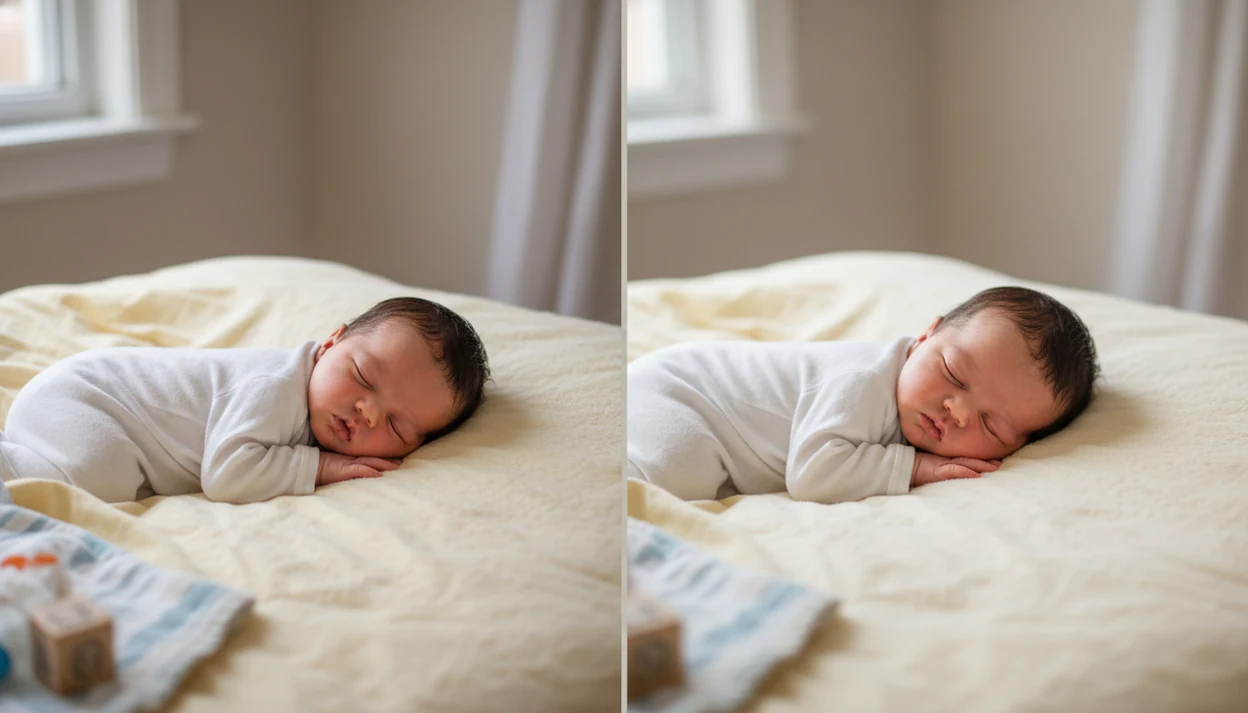
Newborn photo before and after examples are most useful when they show believable improvements: softer light, cleaner crop, calmer setup, natural color, and gentle retouching. The contest-ready after image should still look like the same baby, not a filtered or artificially perfected version.
> Newborn Photo App is a baby photo contest app that helps parents plan, edit, and share contest-ready newborn photos.
In NPC, parents can use the before-and-after comparison as a final check before submitting: original frame, improved crop, natural edit, and rule-ready entry.
- A strong baby photo before after comparison improves light, crop, wrapping, background, and color before relying on heavy editing.
- Safe newborn photo improvement avoids copying advanced poses unless the baby is supported or the final image is safely composited.
- Contest photo examples usually look strongest when skin tone, scale, expression, and styling remain natural and believable.
Newborn Photo Before And After Changes That Matter Most
A newborn photo before and after comparison shows the original baby photo beside a refined version with better light, crop, color, background, and gentle retouching. The useful question is not “Does it look dramatic?” It is “Does it look cleaner while still looking true?”
Start with the visible changes. Soft side light from a bedroom window around 10 a.m. can fix more than a heavy filter. A tighter crop can remove a diaper sleeve from the corner. A plain white crib sheet can calm the whole frame.
The after image should preserve natural skin tone, baby scale, and expression. For contest entries, believable often reads stronger than glossy. Newborn and baby photo contest ideas, photography tips, milestone shoots, and ai newborn photo inspiration should deliver clearer choices, not a fake-looking baby.
How Newborn Photo Before And After Works
Newborn photo before and after works by changing what the viewer notices first. The strongest improvements guide attention toward the baby through light, framing, background control, and edits that support the original moment.
Light direction shapes the whole result. Side light creates gentle shadow, which gives cheeks, eyelashes, and tiny hands more detail; overhead or mixed light can make skin color uneven and shadows harder. Crop and background come next because they remove visual noise before retouching begins. A tighter frame, smoother blanket, or cleaner wall often does more than a skin slider ever could.
Natural retouching means correcting exposure, color cast, lint, flakes, or temporary distractions while keeping the same face, expression, proportions, and newborn texture. Identity-changing edits, like reshaped features, enlarged eyes, plastic skin, or added fantasy elements, can weaken contest credibility because the after image no longer feels like a real entry. For advanced poses, safe compositing blends supported source frames into one final image, so the finished pose looks polished without asking the baby to hold it alone.
Newborn Photo Improvement Workflow From Window Light To Final Edit
Newborn photo improvement works in stages: capture the cleanest possible frame first, then edit only what still distracts from the baby. Image quality usually improves more from controlled light and background choices than from retouching.
- Stable light matters first. Put the baby near soft window light, not under mixed ceiling bulbs and blue daylight.
- Simple setup reduces editing later. A wrinkled muslin swaddle, a neutral blanket, and one small keepsake are easier to refine than five props.
- Select the sharpest frame before touching sliders. A yawn caught mid-frame is sweet, but soft focus stays soft.
- Edit in order: crop, exposure, white balance, distraction cleanup, then gentle skin edits.
- Some advanced posed images are composites, meaning multiple safely supported frames are blended into one final image.
For some poses, such as the froggy pose, photographers often use compositing rather than asking a baby to hold an unsupported position. A caregiver within arm’s reach is part of the setup, not an optional extra. For safety context, the American Academy of Pediatrics recommends a firm, flat sleep surface and no soft bedding during infant sleep (https://www.aap.org/en/patient-care/safe-sleep/); posed photo setups should be brief, awake, supervised photography setups, not sleep setups.
6-Step Baby Photo Before After Process For Contest Entries
Does a baby photo before after process need professional tools? No. It needs one strong original, a calmer setup, and restraint during the edit.
- Choose one sharp original where the baby’s face, hands, or profile is clearly visible.
- Improve the setup by removing clutter, smoothing the blanket, and checking for pacifier clips or burp cloths in the frame.
- Move the baby toward soft window light, keeping the pose simple and supervised.
- Crop for the entry form, especially if the square crop box might cut off a bonnet or grandparent’s hand.
- Edit lightly by correcting exposure, white balance, and small distractions without changing the baby’s identity or expression.
- Check contest credibility by comparing the final image with the official rules and saving screenshots before posting.
For new parents, a repeatable entry checklist can be easier than guessing from social feeds; our baby photo contest for new parents guide covers that planning layer.
Contest Photo Examples: Snapshot-To-Portrait Before And After
Window-Light Blanket Portrait: the before image is a normal phone snapshot. The crop is loose, the nursery lamp mixes yellow light with window light, and a half-open wipes pack sits near the blanket edge.
The after version is not a studio fantasy. The baby is moved closer to the window, the lamp is turned off, and the phone is held just above mattress height. The blanket is pulled flatter. The crop comes in tighter around the face and wrap, leaving enough space for the contest form.
Warmer white balance helps, but only slightly. The skin still looks like newborn skin, with tiny color shifts and texture left in place. That is why the result feels contest-ready without pretending the family hired a full portrait studio.
Small fixes add up.
Newborn Photo Before And After Setup: Props, Wraps, And Background
Simple Wrap And Neutral Blanket: many strong before-and-after examples improve because the setup gets quieter, not because the edit gets louder. One meaningful prop usually photographs better than a crowded theme.
| Setup choice | Before problem | After improvement |
|---|---|---|
| Busy props | Toys, signs, baskets, and blankets compete with the baby | One teddy or no prop keeps attention on expression |
| Loose wrap | Fabric bunches around the chin or covers tiny features | Smoother wrapping creates shape without looking stiff |
| Mixed background | Patterned sheets and furniture edges split the frame | A neutral blanket gives consistent color |
| Complicated pose | The setup asks too much from the baby | Safe, simple posing keeps the entry believable |
A hospital bracelet in a keepsake box can be meaningful beside the frame, but it does not need to sit on the baby. For relatives entering keepsake images, the baby photo contest for grandparents planning page explains how family context can stay respectful and clear.
Natural Editing For Baby Photo Before After Skin Tones
Gentle Color And Skin Cleanup: natural newborn editing means correcting the image, not redesigning the baby. Contest judges and family viewers both notice when skin becomes orange, porcelain-smooth, or oddly airbrushed.
- Exposure correction should brighten the face without blowing out the blanket or swaddle.
- White balance should remove yellow or blue casts while keeping real newborn warmth.
- Shadow lift can open the eyes and cheeks, but flat shadows make the image feel pasted together.
- Spot cleanup works for lint, blanket fuzz, or a temporary flake; it should not erase all skin texture.
- Heavy blur, enlarged eyes, and AI-style perfection weaken contest credibility.
Tools like Newborn Photo App, Canva, and babyphotoart.app can help parents compare edits, crops, and captions. The safer rule is still simple: if the “after” looks like a different baby, pull the edit back.
4 Newborn Photo Improvement Myths About Editing, Timing, And Safety
Newborn photo improvement has a few stubborn myths, and they can lead to weak entries or unsafe copying. The better approach is practical: improve what you can, and respect what the original photo cannot support.
- Myth 1: the after photo should look heavily edited. In reality, subtle crop, light, and color changes usually age better.
- Myth 2: editing can fix any poor original. Bad focus, motion blur, and harsh overhead light may still show.
- Myth 3: all posed newborn photos are safe to copy. Some dramatic poses require training, adult support, and composite editing.
- Myth 4: newborn photos only work in the first few days. Many photographers prefer early sessions, often within the first two weeks, but older newborns can still photograph beautifully with simpler expectations.
- Myth 5: timing matters more than patience. A calm baby, safe setup, and flexible plan often matter more than chasing one exact day.
Photographers often talk about an early newborn window as a posing preference, not a medical rule. Pediatric safety guidance is about safe handling and sleep environment, not hitting one perfect photo day (https://www.aap.org/en/patient-care/safe-sleep/). Reset the plan around the baby you actually have that day.
Limitations
Before-and-after newborn edits have limits, especially when safety, focus, and authenticity are involved. A stronger final image should never depend on hiding an unsafe setup.
- Bad focus and motion blur cannot be fully repaired by sharpening.
- Harsh light may leave deep shadows or blown highlights that still show after editing.
- A poor pose is not just a visual problem; advanced newborn poses may require training, support, and compositing.
- Older newborns can still be photographed, but they may need simpler wraps, awake portraits, or family-held images.
- AI inspiration does not replace safe handling, real photo quality, or a caregiver within arm’s reach.
- Over-editing weakens keepsake value and contest trust because the image stops feeling like the baby.
- Official rules may reject images with heavy manipulation, added elements, or unclear rights and permissions.
When rules mention photo alteration, AI-generated elements, or image rights, treat that contest's official rules page as the source of truth before submitting.
Apps such as Newborn Photo App and NPC can help organize contest-ready newborn photos, but the original image still matters most.
FAQ
What does newborn photo before and after mean?
It means comparing an original newborn image with a refined final version after changes such as crop, lighting, color, setup, or gentle retouching.
How do I improve newborn photos?
Improve light, crop, background, wrapping, and color before relying on edits. Use a safe, simple pose and remove visible distractions from the frame.
Should newborn photos be heavily edited?
No. Subtle, natural editing is usually better than heavy filters, plastic skin, orange color, or artificial facial changes.
Can editing fix blurry newborn photos?
Editing cannot fully repair poor focus or motion blur. It is better to choose the sharpest original frame before making improvements.
Are posed newborn photos safe?
Simple, supported poses are generally safer to attempt at home. Advanced poses may require training, hands-on support, and compositing.
What is a newborn composite photo?
A newborn composite photo blends multiple supported images into one final pose. It is often used so the baby is never unsupported during the setup.
When should newborn photos be taken?
Many photographers prefer the first two weeks because babies may be sleepier and easier to wrap. Older newborns can still be photographed with simpler expectations.
Do contest photos need professional editing?
No. A contest photo can work well if it is clear, natural, well-lit, believable, and follows the official rules.